At the heart of the need for roll-ups, is the reluctance of users to click down through many hierarchical lists, do the sorting and filtering, then to move on to another list. I understand how SharePoint can be a real bear, with drill-down after drill-down.
For a recent roll-up, I created several "master views" of various data pulled from various "Issue Tracking" lists. This was to help a senior developer track metrics across a number of web development projects.
Each list was of the same type, so that each field across the lists had the same name and setup.
Step 1: Create a new page from a top-level site. Specifically, create a new "Web Part Page". I chose the template "Full Page, Vertical". You new page with be saved in the top-level document library, as an *.ASPX file.
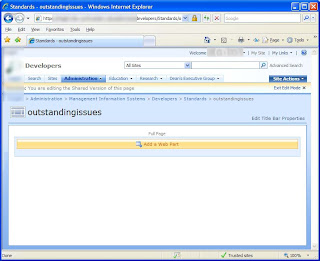
Step 2: Open this page within SharePoint Designer.
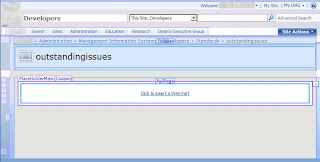
CODA
There's only one web part zone within the page we just created. For my roll-up page, I want to get specified summaries of different lists, not a conglomeration of filtered and sorted data across various lists. I need to create another web part zone. I copy the following code from SPD:
<WebPartPages:WebPartZone runat="server" Title="loc:FullPage" ID="FullPage" FrameType="TitleBarOnly"><ZoneTemplate></ZoneTemplate></WebPartPages:WebPartZone>
...and paste a copy below. I rename the Title and ID tags to have two web part zones on my page, one on top of the other. There's an easier way to create a "New Web Part Zone" through SPD, but I'd rather create one I can trust.
Step 3: Date Sources. We're pulling data from across lists in this case, more specifically, from lists in child sites down from a master site. Connect to a list via the Data Source Library. You'll have to "Connect to another library..." and browse through child sites. You'll connect at the site level.
Once you've added the connection, you should be able to drill down to the list you need through the data source library toolbox.
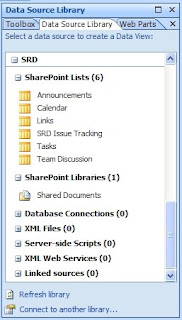
In my case, it's an "Issue Tracking" list I want to pull data from. I left-click the list and "Show Data". A row of columns is returned. You can select the columns or fields you want to show up in your roll-up and click the "Insert Selected Fields as..." button.
Step 4: Insert Fields. I want the following fields to show up in one of my linked web parts: Title, Assigned To, Issue Status, and Created. I select those fields in the Data Source Details box and insert the fields as a "Multiple Item View".
On inserting the fields, SharePoint Designer adds about 150 lines of mark-up to you page. And it adds all the records from your list, but in a paginated way. You need to adjust the "Common Data View Tasks" options, by left-clicking the carat in the upper right hand corner of your new DataFormWebPart. With this menu you can filter, sort, page, change the layout, etc.
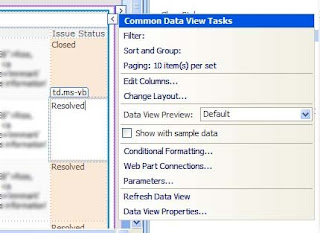
Step 5: Filter Data. I'm going to filter by "Issue Status". I don't care about anything, except items that are open. I add a filter, "Issue Status Equals 'Pending'.
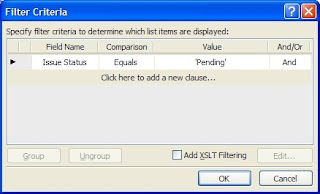
This changes the <SharePoint:SPDataSource...> tag to only return the data as filtered. The "selectcommand" is fulled escaped, but makes more sense with tags:
selectcommand="<View><Query><Where><Eq><FieldRef Name="Status"/><Value Type="Text">Pending</Value></Eq></Where></Query></View>"
Step 6: Fix some field output. You'll see the "Assigned To" field contains a shocking amount of HTML code just to display a user name, a link to the user's profile, and the presence of the user:
<nobr><span><A HREF="/admin/mis/developers/mis_projects/education/srd/_layouts/userdisp.aspx?ID=268">Jack Sparrow</A><img border="0" height="1" width="3" src="/_layouts/images/blank.gif"/><a href='javascript:' onclick='IMNImageOnClick();return false;' class='ms-imnlink'><img name='imnmark' title='' border='0' height='12' width='12' src='/_layouts/images/blank.gif' alt='No presence information' sip='j-sparrow@notforyou.org' id='imn_293,type=smtp'/></a></span></nobr>
To fix this, you need to adjust the field display. If you hover around column that you need to fix, you should get a right-facing carat that allows you to edit "Common xsl:value-of Tasks". Change the "Assigned To" field to rich-text, and you have essentially disabled output escaping to the field, reflected in your ASPX markup as such:
<xsl:value-of select="@AssignedTo" disable-output-escaping="yes"/>

Step 7 & 3: Rinse and repeat for how many other child lists you want to pull into your "roll-up".


Thanks I used it for Display Assign By field
ReplyDelete